Prerequisite to use APPIUM:
- ANDROID SDK :
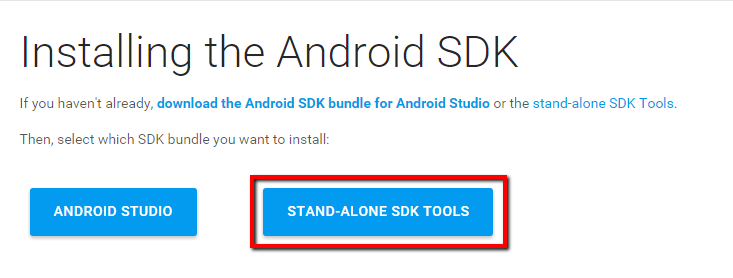
- Go to following URL https://developer.android.com/sdk/installing/index.html
- Select Stand-alone SDK tools
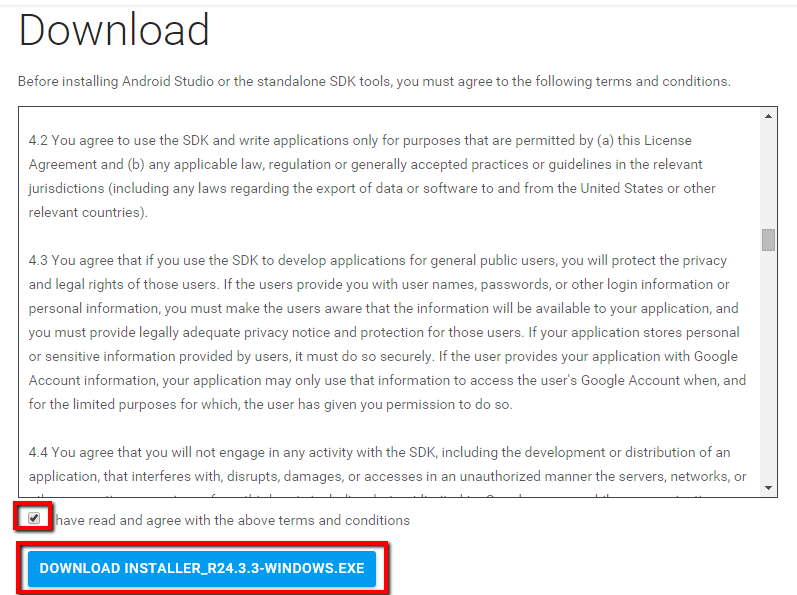
- Click Download SDK now

- Based on Platform we need to select the file (mine is windows, so downloading .exe)

- Accept the terms and conditions and click on Download
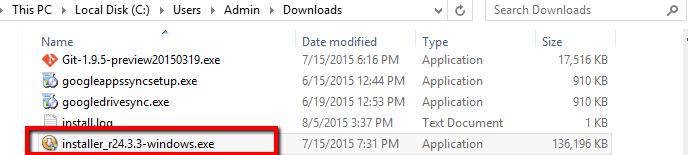
- It will automatically start download file as mentioned below

- Open containing file of downloaded file
- Double click on installation file and Follow the mentioned in the dialogue box


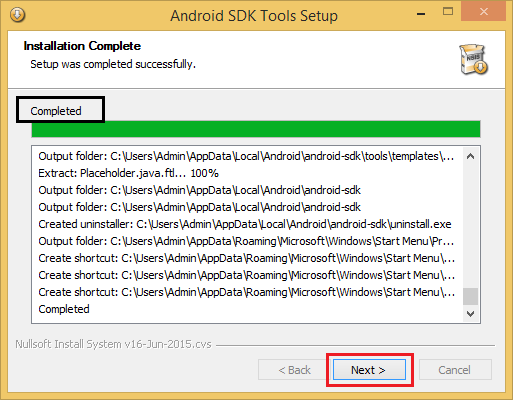
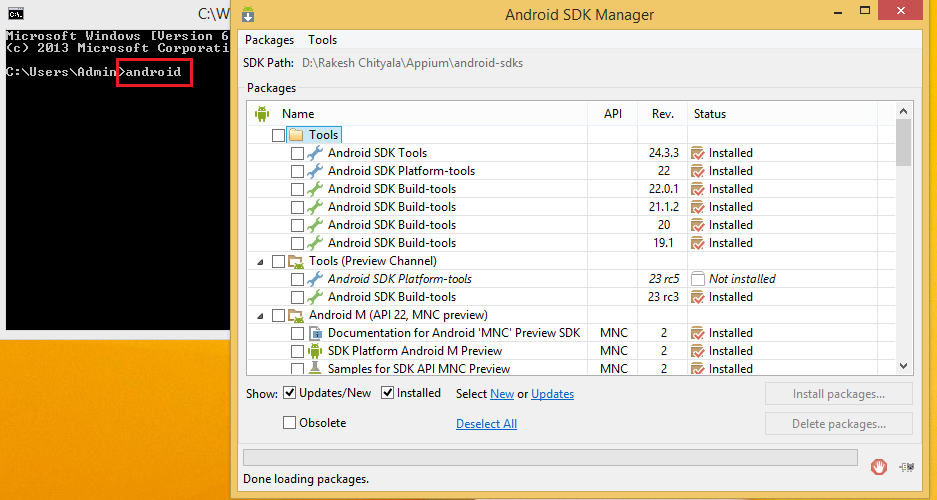
 After clicking the finish button it will open the SDK Manger
- Select the required tools and API versions to click on Install packages to Install
Make sure java has been installed in you machines. Along with java path in environment variables.
Create a project
File → New → Java Project → Enter Project Name → Click on Finish
Make Sure JRE version has been picked by default in the JRE section

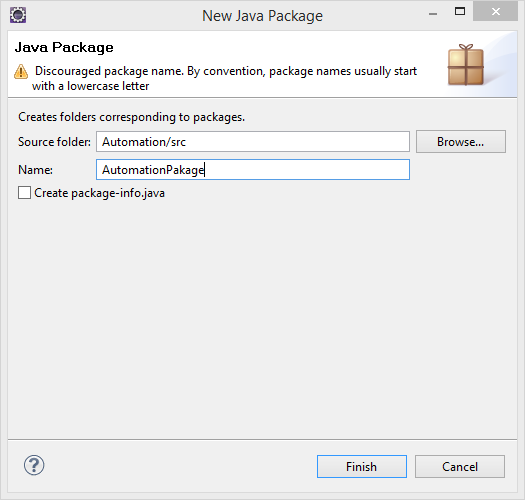
Right click on Project Name → New → Package

Enter package name and Click on Finish
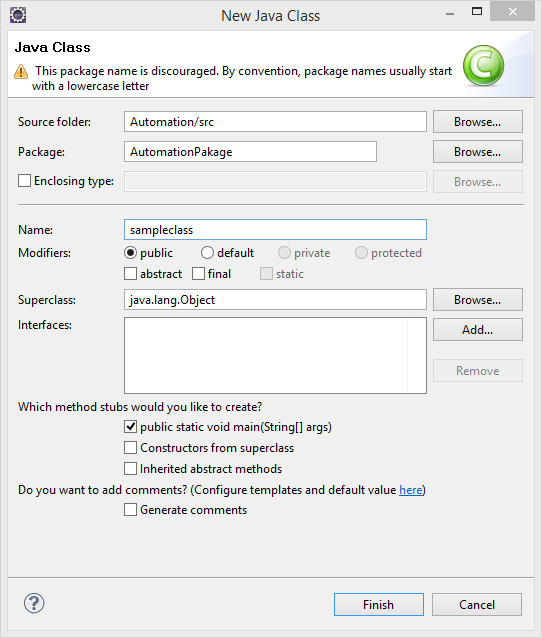
Right click on package → New → Class

Enter Class Name and Click on Finish
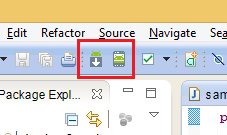
- Select Help / Install new software.
- Search for new features to install.
- New remote site.
- Make sure the check box next to URL is checked and click Next.
- Eclipse will then guide you through the process.
- After successful installation of TestNG, we create TestNG class
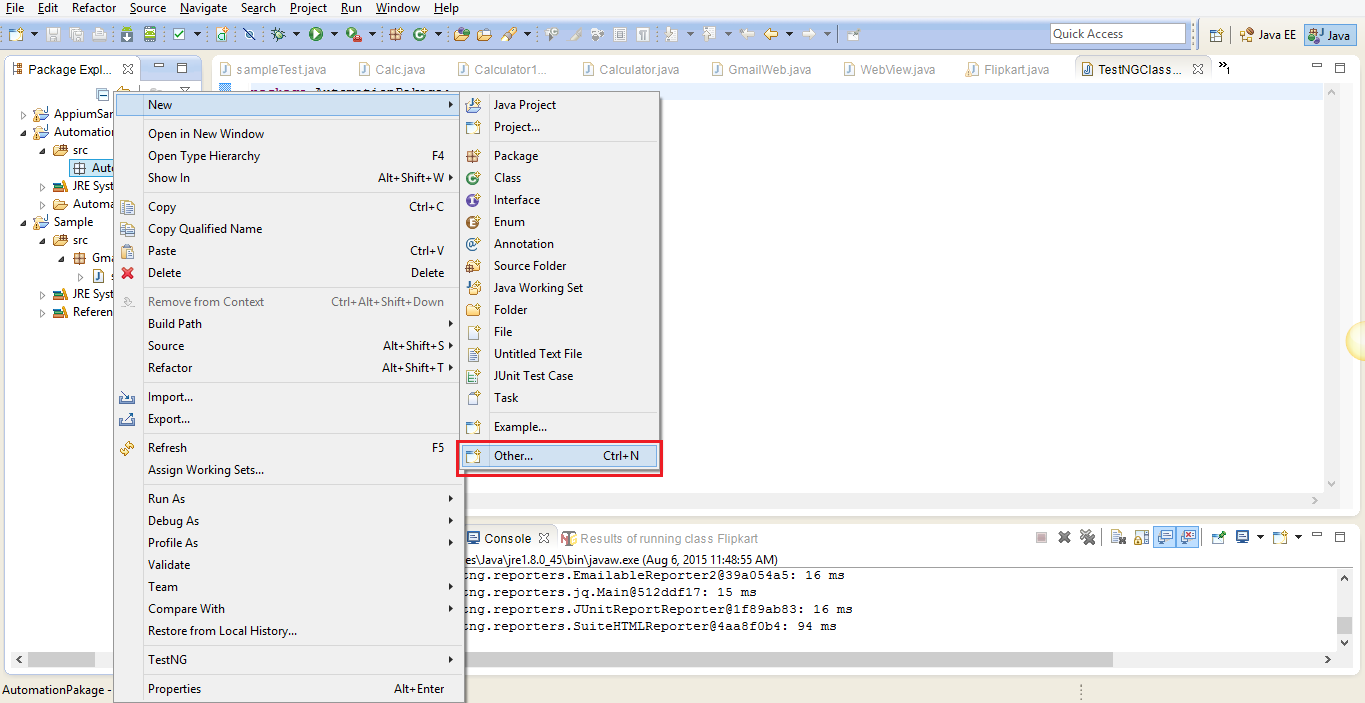
Expand the a project → Right click on a class → New → Other
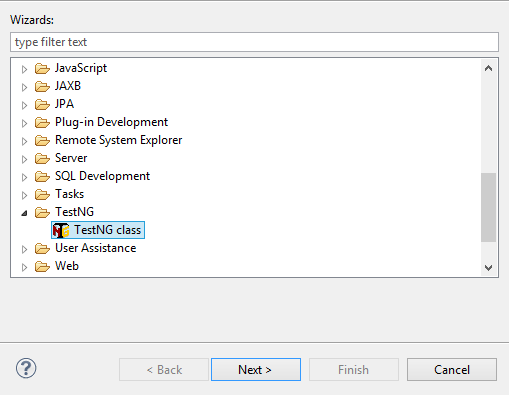
Select Test NG class → Click on Next
Enter Class name and Select the Annotation, Click on Finish

- Download selenium server jar from the selenium
- Add this jar files to the respective project
How to Add Jars
- Right click on a project → Build path → Configure Build path

Click on Add external Jars

Select Selenium server and Selenium Java jars (which we can download from http://www.seleniumhq.org/download/)
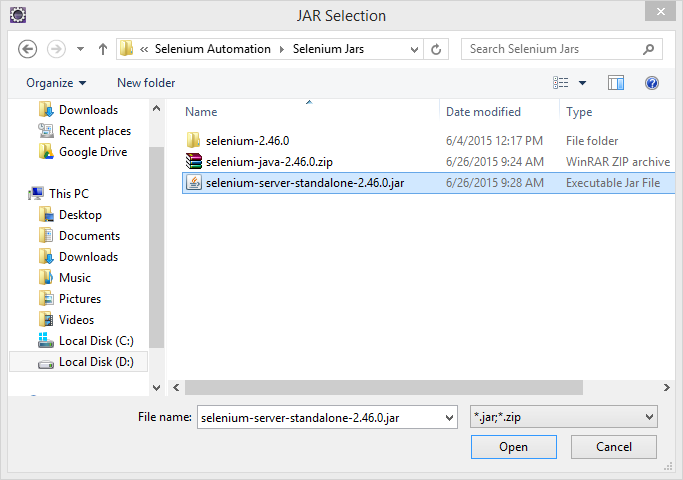

Click on ‘Open ’ after selecting the jar and Click on ‘Ok’
- Download the webdriver jar and add it to the current project
Download appium here

Click on Download Appium, It will automatically start downloading Appium for windows
Extract the file from file and install the server by double clicking the ‘appium-installer.exe’
- How to work with emulators:
Installing Eclipse plug-in click Here
Make sure URL whuch was provided in preferences is matching to where SDK file has been installed.
Window → preferences


After successful installation SDK Manager and AVD icons will be displayed
SDK Manager : It is used manage the API
AVD: Used to create the Virtual devices

- Set Android Home:
set ANDROID_HOME=C:\<installation location>\android-sdks
set PATH=%PATH%;%ANDROID_HOME%\tools;%ANDROID_HOME%\platform-tools
If everything is done perfectly then it will open SDK Manager when we type ‘android’ from cmd
- Prerequisites to write Appium Code:
- Make sure Android SDK has been installed and Path has been set in environment variables
- Libraries of both selenium and Appium has been Added into the project
- Appium.exe Must be installed in machine
- Need to start the server before executing the appium program
- UI Automator: To locate the elements
- UI Automator:
- To analyse the UI components of the application that you want to test, perform the following steps after installing the application given in the example.
- Connect your Android device/open emulator to your development machine
- Open a terminal window and navigate to <android-sdk>/tools/ and Run the tool with this command
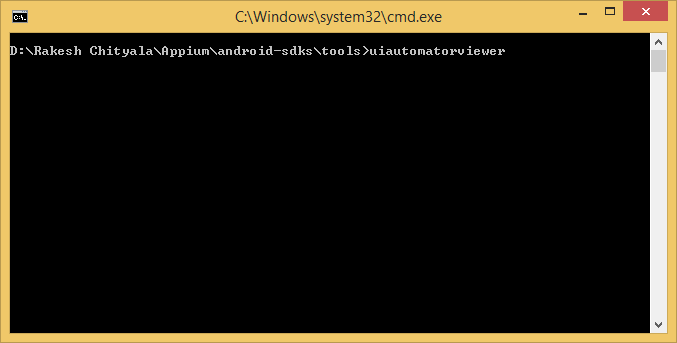
- You will see the following window appear. It is the default window of the UI Automator Viewer.

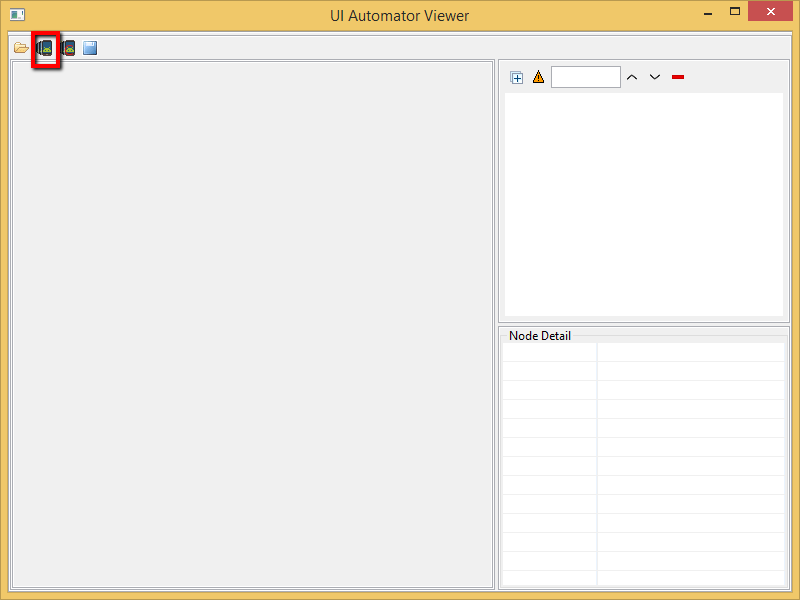
- Open AUT and Click on device icon at the top right corner
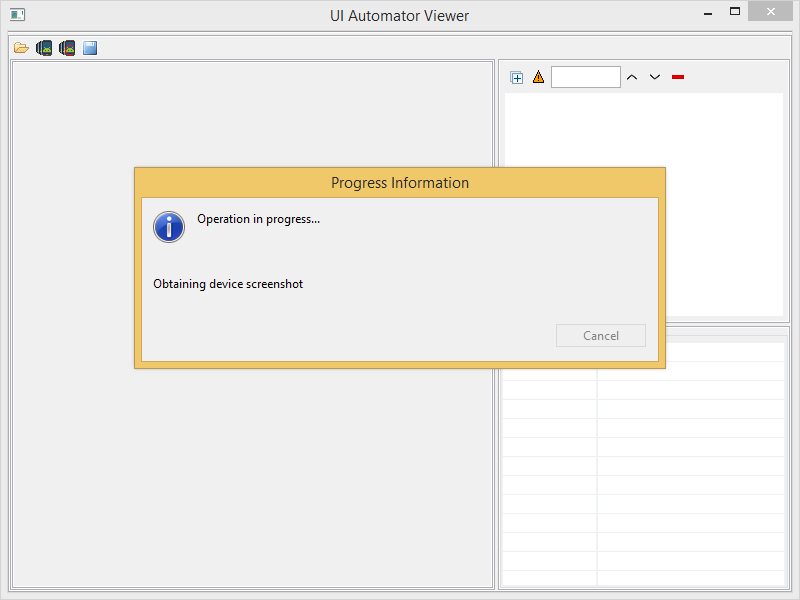
- It will start taking the UI XML snapshot of the screen currently opened in the device. It would be something like this.
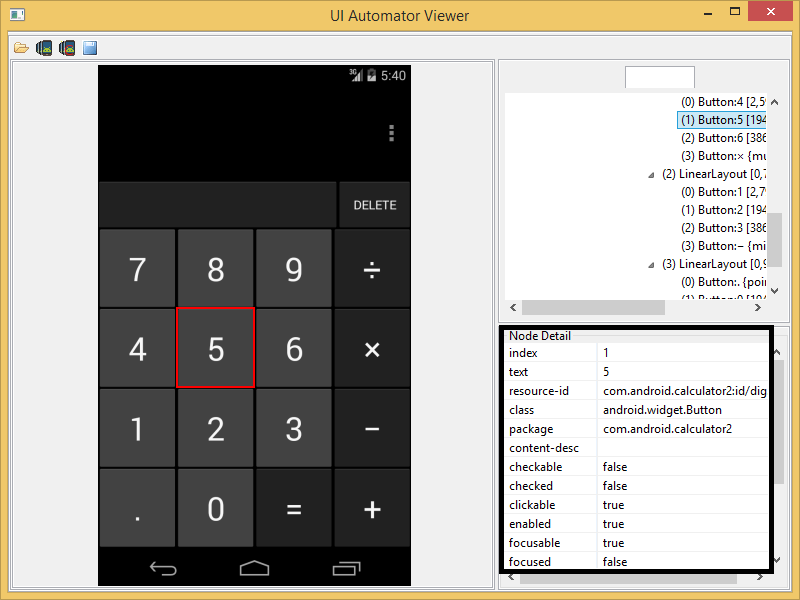
- After that, you will see the snapshot of your device screen in the uiautomatorviewer window.

- Need to move the cursor and click on a particular element to identify the elements properties
- Identifying activity name packagename using apk file
Method 1:
Method 2:
Step1: Start "adb logcat" in command prompt.
Step2: Open the app (either in emulator or real device)

In the above image Activity Name is : com.android.calculator2.Calculator
Package name will be: com.android.calculator2
Method 3:
- Open SDK folder and go to build-tools folder.
- Open any folder (example: 21.1.2).
- Open a command prompt window in this folder ( Shift+ right click – Open command window here).
- Run command “aapt list -a “path_to_apk_we_need_to_test” >manifest.txt” ( this command will write the app manifest in manifest.txt file inside the same folder).
- Open the manifest.txt txt file.
- At the beginning of the file there should be details about the package including name ( example: com.example.android.contactmanager).
- At the end of the file there should be details about activity including name ( example: ContactManager).
Method 4:
We can get package name from the play store URL

- Node.js (Not Required - Whenever Appium server is installed, it by default comes with "Node.exe" & NPM. It's included in Current version of Appium.)
- Required capabilities before writing the appium code:
- Dev ice name
capabilities.setCapability("deviceName","Emulator");
- Platform name
capabilities.setCapability("platformName","Android");
- Package name
capabilities.setCapability("appPackage", "com.android.calculator2");
- Activity Name
capabilities.setCapability("appActivity","com.android.calculator2.Calculator");
- Connect with appium serve r using the URL
driver = new RemoteWebDriver(new URL("http://127.0.0.1:4723/wd/hub"), capabilities);
- Sample Appium code:
package appiumPakage;
import java.net.MalformedURLException;
import java.net.URL;
import org.openqa.selenium.By;
import org.openqa.selenium.WebDriver;
import org.openqa.selenium.WebElement;
//import org.openqa.selenium.remote.CapabilityType;
import org.openqa.selenium.remote.DesiredCapabilities;
import org.openqa.selenium.remote.RemoteWebDriver;
import org.testng.annotations.*;
public class Calculator {
WebDriver driver;
@BeforeClass
public void setUp() throws MalformedURLException{
//Set up desired capabilities and pass the Android app-activity and app-package to Appium
DesiredCapabilities capabilities = new DesiredCapabilities();
//capabilities.setCapability("BROWSER_NAME", "Android");
//capabilities.setCapability("VERSION", "4.4.2");
capabilities.setCapability("deviceName","Emulator");
capabilities.setCapability("platformName","Android");
capabilities.setCapability("appPackage", "com.android.calculator2");
// This package name of your app (you can get it from apk info app)
capabilities.setCapability("appActivity","com.android.calculator2.Calculator"); // This is Launcher activity of your app (you can get it from apk info app)
//It will launch the Calculator App in Android Device using the configurations specified in Desired Capabilities
//Create RemoteWebDriver instance and connect to the Appium server
driver = new RemoteWebDriver(new URL("http://127.0.0.1:4723/wd/hub"), capabilities);
}
@Test
public void testCal() throws Exception {
//locate the Text on the calculator by using By.name()
WebElement two=driver.findElement(By.name("2"));
two.click();
WebElement plus=driver.findElement(By.name("+"));
plus.click();
WebElement four=driver.findElement(By.name("4"));
four.click();
WebElement equalTo=driver.findElement(By.name("="));
equalTo.click();
//locate the edit box of the calculator by using By.tagName()
WebElement results=driver.findElement(By.className("android.widget.EditText"));
//Check the calculated value on the edit box
assert results.getText().equals("6"):"Actual value is : "+results.getText()+" did not match with expected value: 6";
}
@AfterClass
public void teardown(){
//close the app
driver.quit();
}
}